Thursday, December 26, 2019

MAYAN Gets Her Rudder Re-Shaped

John G. Alden designed hundreds of boats over many decades. MAYAN is design number 356-B and based a design from 1928. Alden's design serves a specific mission: To annually traverse the Intercoastal Waterway from New England to the Carribean in the fall, returning home in the spring.

To succeed in this mission, MAYAN needed a draft no deeper than 5' with her centerboard up to avoid the shoals. She needed a masthead no higher than 65', to clear the bridges without forcing them to open. She needed a broad beam to hold her up against a stiff breeze, and a long waterline to let her make the passage quickly.

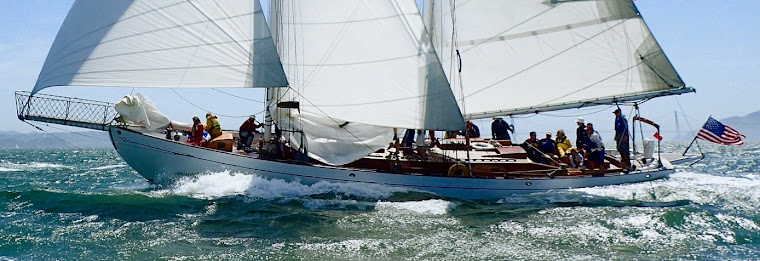
MAYAN sporting her beam and shallow draft
Alden's design delivered solutions to all these problems in a graceful seaworthy design: 60' on deck, 16'6" of beam, 4'6" of draft, a 45'6" waterline, and a mainmast head that stands 63' from the waterline. She is a bit short on sail-area, but that's perfect for her new home sailing on Monterey and San Francisco Bays. Here we have consistently strong winds that mask the ill effects of MAYAN's small rig. A side effect of her shallow draft is that her rudder is a bit under 4' tall. When combined with rather primitive ideas about hydrodynamics, it was challenging to keep MAYAN on course in quartering seas and hard to maneuver in close quarters. The advantages of our strong local winds dissipated on the square front and blunt trailing edge of our antiquated rudder shape.

I'm catching up on long-overdue posts. Our significant winter project last year was to re-shape the rudder while MAYAN was ashore to refresh her anti-fouling paint and various other maintenance tasks. Homer Lighthall, who has built hundreds of rudders for racing boats like MERLIN, was recruited to perform the work. Bill Lee, the yacht designer, volunteered to advise on the new shape. A squad of friends formed up from thin air and offered opinions about nearly everything.

The original rudder had a substantial list of problems:
MAYAN Original Rudder Shape
1) The prop aperture took up more than one-third of the leading edge of the rudder. 2) That leading edge was 4" thick, cast of bronze, and sported square corners!
3) The trailing edge of the rudder was 3" thick and finished in a hemisphere; one of the worst shapes when considering drag.
4) The rudder didn't extend up to the counter above, leaving a gap between the rudder and the hull.
5) The rudder didn't extend to the full depth of the keel, leaving it undersized.
6) A gap of 3" ran between the deadwood and the rudder post, allowing turbulence to form along the leeward side of the rudder.

Cardboard CAD
As Bill and I discussed various strategies to re-shape, extend vertically, and reduce the after edge of the rudder, Homer appeared with a sheet of cardboard. He clamped it to the old rudder, lining one side with the trailing edge of the deadwood. Trimming the right angle with a box cutter, Homer slid the top up until it was as close as possible to the counter. Extending a straight edge from the bottom of the keel, he cut the lower side of the cardboard. Finally, after stepping back and estimating the new additional area, he cut the cardboard short of the trailing edge of the old rudder. In ten minutes, Homer had designed the profile of a new rudder, expressed in cardboard. Bill weighed in, "That's about right."

I was still pondering which CAD system I was going to use to draw up the new rudder profile.... but, it was over. Homer's design looked good to me. Cardboard CAD!

Old Rudder vs new Cardboard CAD
"Homer, I'd like to have the same rudder area so that we don't change the boat's handicap rating," I said.

"I'll get my tools," Homer responded. Measure what I've added and what I'm going to cut off. Let me
know if I missed it."

Five minutes with a tape measure confirmed that Homer's eye was nearly perfect. He was off by less than two square inches out of a total of 1,848. "Damn near perfect!" I told him as he returned with his pushcart loaded with a circular saw, power planer, and angle grinder.

"Do you two want to talk about this more, or is this good enough?" Homer asked Bill and me.

"It looks about right to me," responded Bill.

With a little trepidation, I agreed. "Go for it, Homer," I said, sounding more confident than I felt. "We can always screw some back on if it's too small."

Homer just laughed and scribed a line on the old rudder following the trailing edge of
the cardboard. Then, picking up his circular saw, he cut about 7.5" off of the trailing edge of the old rudder along a graceful curve. Seeing a four foot high, by 7.5" wide, by 3" thick slab of wood laying on the concrete under MAYAN, felt incredibly odd. It had happened so fast.

Trading the circular saw for the power planer, Homer went to work, making the trailing edge of the rudder thinner. He worked entirely by eye. Where I would have built templates and patterns, Homer just ran his hand over the shape, stepped back to look at it every few minutes, and kept grinding. My job was to sweep up the rapidly growing mound of teak shavings growing underfoot.

To reinforce the wood and transfer the significant loads from the rudder shaft aft to the blade, the original builders had used two 3" by 1" bronze straps, which extended aft three feet. Homer cut away the last four inches of these straps.  Removing the tail end of the bronze straps allowed the after edge of the rudder to be ground down to a far narrower shape. Before the advances in hydrodynamics made in the 1950s, builders and naval architects didn't appreciate the drag created by thick foils. MAYAN was being brought forward into the 21st century just a bit.

With the profile and the foil shape roughed out, Homer headed off to his shop to order some 4" thick mahogany he could use to build up the top and bottom of the rudder to match the cardboard pattern. I set to work grinding all the paint and putty from what remained of the rudder and from areas of the deadwood, which would be shaped and faired to let the water approach the rudder and aperture.

Just aft of the propeller, the square leading edge of rudder was now clean, shiny bronze, highlighting the absurdity of its 4" thick square-cornered shape. As Homer looked over my shoulder, he laughed at the shape.
Re-Shaped Leading Edge In The Aperture

"That's like towing a bucket!" and then continued, "It is terrible in that spot because the water leaving the propeller is moving a lot faster than the boat, It hits that flat surface and goes around those square corners. I'll bet she'll get better fuel economy once we fix that."

Having completed the cleanup, I sat in the shade under MAYAN's port quarter and researched the clearance the MaxProp required aft of the blades and at the tips. We had plenty of space. It seems that MAYAN had once had a much larger propeller. At least she had an aperture large enough to accept one.

"What's the answer?" asked Homer.

"We can make the leading edge round. We've got 5" to work with, and we only need two. We can also bring the bottom of the aperture up about 3".  I replied.

"That's what I was hoping," replied Homer as he started cutting the long wooden strip for the bottom of the rudder.

Taking Shape - Note: New Wood and
Bronze Straps

Within an hour, he had cut the bottom edge of the rudder off straight and square, roughly shaped the new addition, dry-fit the new piece with long screws, and then attached it with West Epoxy and a bonding thickener. Turning his focus to the top of the rudder, he installed the new wood in the same manner. Mixing up epoxy and a sanding filler, he built up low spots on the sides of the rudder, which I hadn't noticed.

"We'll start final shaping tomorrow," Homer announced as he packed up his tools. We were only a few days into the project, and MAYAN's rudder looked entirely different.

As always, the final shaping takes much longer than I expected. It is a series of steps repeated over and over. First, the planer and grinder rough out the shape. Then, epoxy filler builds up low spots. Finally, after more shaping with the planer, hand rasps, and a sander, it's back to the first step to continue the shaping. With each pass, the flat wooden plank, which was MAYAN's original rudder, was becoming a much more modern foil shape.

As Homer worked his magic with the power planer, I assigned the task of figuring out how to fill in the large gap between the rudder shaft and the trailing edge of the deadwood. Taking a cue from Homer's work on the rudder, I fashioned wooden blocks which we attached to the deadwood with epoxy and small screws. The trailing edge of these blocks cut to a concave grove to parallel the front of the rudder shaft.

Filling The Gap, Rudder On The Left
We exposed the blunt leading edge of the bronze straps holding the gudgeons to the deadwood. A ramp of thickened epoxy served to fair their sharp corners into gentle bumps, further reducing drag. I ground away the anti-fouling paint to expose the epoxy and epoxy primer sealing the hull and re-coated everything with West Epoxy making it ready for the new primer.  Epoxy's ability to survive for decades underwater undamaged and its ability to adhere to high moisture content wood make it the perfect sealer and glue for work on wooden boats.

Homer (l) and Matthew (r) Comparing the
New Trailing-Edge to the Old
As Homer wrapped up his tenth day of work shaping the rudder, I fashioned a template of the port side. Having watched Him work by eye for days, I was impressed with how symmetrical the shape of the rudder had become. But, it was time to measure it with something more accurate than my eye. Flipping the template over I, lined it up along the starboard side of the rudder. It fit perfectly. Homer had shaped the 4' broad and now 5' tall rudder perfectly. Using nothing but his decades of experience and skill, he had shaped the two sides of MAYAN's rudder to within a few thousandths of an inch.

As we examined the new rudder shape, one of our long-time crew, Matthew, joined in by holding up the old trailing edge of the rudder for comparison. It wasn't until relatively recently, by schooner standards, that designers realized that the trailing edge should be nearly sharp. As we now know, the hemispherical shape of MAYAN's old rudder trailing edge is just about the worst possible shape, causing more turbulence than a square edge. We predicted this change in the trailing edge would improve MAYAN's performance substantially.

Finally nearing the end of the project, Homer and his team applied two layers of West epoxy and glass cloth to the rudder and deadwood, completely sealing the rudder and bonding the new wood along the rudder shaft to the deadwood. Two coats of epoxy primer covered the West to fill the cloth pattern. Then three coats of anti-fouling finished everything off.

How did it work?
New Rudder Shape Completed

After relaunching MAYAN, we headed out of Santa Cruz Harbor on a calm day. In the channel, idling along at 4 knots, everything felt about the same. But, upon reaching the open Monterey Bay and pushing the engine up to 1750 RPM, the crew and I exchanged glances. It was noticeably quieter.

Gone was the RUMMA-RUMMA-RUMMA of the prop wash smacking into the square flat-fronted rudder just aft of the propeller. Now at 1750 RPM, in a calm sea, MAYAN was making 8.2 knots through the water, a full knot faster than with the old rudder shape.

I pushed the rudder hard over. We watched as MAYAN turned much more quickly and in a far tighter turning circle. Our experienced eyes estimated that at maneuvering speeds, the turning circle was at least one boat length smaller.

Perhaps the most attractive feature of the new rudder shape was expressed by Gene, our most experienced crew member at 80 years old, when he announced, "I used to have to work at turning her. Now I'm driving around with just one hand on the wheel!" His smile was infectious. As each of us drove MAYAN around in drunken circles, backed her up, and spun her side to side, the grins grew wider. The new rudder was a tremendous success.
Gene Sofen at the helm, MAYAN

Saturday, November 23, 2019

MAYAN: Updating the Blog

We've Been Silent Too Long: I'm embarrassed to see how long it's been since we updated this site. Ah, well, our primary excuse is that we have done a lot to MAYAN and then sailed her a lot. Our secondary explanation is that we tried out using Facebook as a place to post things, which didn't work as well. The FB interface isn't set up to support someone who wants to write pieces that are more complex than a paragraph. As a result, we're back here.

To start with one of our more recent exploits as a bit of a tease for the rest of the story, here is our girl crossing the finish line in first place during the last race of the 2019 Rolex Big Boat Series. 

Now, back to where we were when we last wrote here on this site. 

Wet ride north of Pt. Conception
Gettin' Outa LA: When we last blogged here, MAYAN was getting her new rail caps, a new cockpit, new fuel tanks, fresh fuel, and exhaust system, etc... etc... etc...

With that work finished, we left LA in a non-stop passage north to San Francisco in September of 2018. The short version is: No wind or waves south of Pt. Conception, 30-40 knot winds and enormous seas from Pt. Conception north, arrived in San Francisco sopping wet and tired. Cleaned and dried out MAYAN in two hours and greeted our guests for a cruise to the Sacramento Delta. There is a great deal more to the story, but that deserves and will receive its own story.

As we tied up to the fuel dock in Santa Barbara, the attendant greeted us: "Welcome home, MAYAN. It has been too long." In every port we've entered along the coast of California, MAYAN is a long-missed friend.

As a teaser, the video on the left shows the water running off the chart table. The decks were deeply awash for two days as we slogged north.

Commodore Glidewell awarding Beau the Jessica Cup
2018 StFYC Jessica Cup: Following our cruise to the Sacramento Delta, we gathered MAYAN's race crew together and joined the fun in the StFYC Jessica Cup. Each year the Jessica Cup gathers a group of classic yachts together to race around the central San Francisco Bay. A fantastic venue for MAYAN as the winds are traditionally strong, and she loves a breeze. MAYAN managed to win both races on handicap and came away with the Cup.

2018 Leukemia Cup: Many of us have lost loved ones to the various forms of blood diseases. Each year the San Francisco Bay plays host to the most significant money-raising Leukemia Cup in the country. The Corinthian YC provided the racing and sent the classic yachts on a course, which was a lovely tour of the central Bay. With light winds and some great sailing by a beautiful 30-foot Bird class boat, MAYAN ended up in mid-fleet. 

Sailing MAYAN home to Santa Cruz
Following the racing, it was October and time to sail MAYAN home to Santa Cruz. We gathered up crew from 4 to 80 and had a lovely sail down the coast in postcard weather. We were finally back in our home slip and ready to get to work on winter projects. 

We feel that this will become our pattern in future years. Enjoy the warmer spring sailing in Santa Cruz and points south, then move to the San Francisco Bay for the lovely fall weather, returning home as the stormy weather of November starts to arrive.

MAYAN showing her beam
Winter Projects: As every boat owner knows, winter is the time when one puts dreams of warm, gentle breezes and gets to work on all the tasks it takes to get the boat ready for spring. This year would be no exception. It has been two years since MAYAN had been hauled out, and we had a long list of projects. In addition to refreshing the anti-fouling paint, we needed to sort through and service all the seacocks, and most importantly, do something about the rudder. The rudder project deserves a separate post; we completed the rest of the work as planned. 

Once back in the water, it was time to get to work applying additional coats of varnish all around. People have asked, "What sort of varnish do you use?" and "How many coats does it take?". The quick answer is that the type of varnish isn't nearly as important as how much of it is applied, and most important of all is how frequently those coats are applied. An entire post is required here too.

The Sun is the enemy of varnish. If left exposed, a crew will need to apply a coat every month or two for the best results. If covered, as MAYAN's varnish is, one can use a solid base and three or four top coats, then leaving it covered and only needing a couple of coats a year.

2019 Master Mariners Race: With the weather warming up, it was time to go racing again! Since the 1880s, the Master Mariners Benevolent Society of San Francisco has held a race on the waters of San Francisco Bay. The entry fees were initially used to support mariners who were retired and left ashore in their old age, a near-fatal fate in the late 1800s. Over the decades, this old regatta has become much loved. 
MAYAN: 2019 Master Mariners Regatta

Now populated with classic yachts of all varieties, it has some comical racing rules. Our favorite is that one has to round all marks "...except that hitting a mark with a potato thrown from the Big Schooner will constitute a correct rounding, no matter which side of the mark the Big Schooner is on." Some intense competitors are said to have recruited an outfielder from the San Francisco Giants baseball team to join the crew, thereby allowing them to turn inside of other yachts but still follow this rule. 

Sloppy wet ride heading south to Santa Cruz
Cruising The Coast Again: Some sailors have asked us why we take MAYAN to and from San Francisco so often. Why not leave her in San Francisco Bay all summer? The answer is rather simple. Even in the worst weather, we'd rather be at sea sailing the boat than almost anywhere else. MAYAN is a great boat, even in foul weather. The video to the left is typical. After the Master Mariners Regatta, we headed back home. It was a wet gray day, with a bit of southerly chop running cross the NW swell, creating odd bumps-n-lumps. Because we were short-handed, we set the main staysail to steady the boat and headed for home under power. It was a wet and bumpy ride, but the heater was on belowdecks, Stacey's Amazing Soup was on the stove, and the crew was happy to be at sea.

Stacey Vrolyk
I have gone long enough without introducing Stacey, my perfect partner in life. MAYAN and her crew clad in MAYAN logo-gear, our sailing team shirts are legendary for their bright colors, and the soup is to-die-for! Without Stacey, this program wouldn't be the same. From the help she gives the race team, through the fantastic cruises she hosts aboard, to her incredible willingness to learn an entirely new sport, she's great!
From someone who had never been sailing, let alone heading out in the rough-n-tumble of San Francisco Bay and the legendarily rough ocean beyond the Golden Gate, she has been a willing supporter of the MAYAN project. Our cruising crew's first question is: "Will Stacey be bringing the food?!!?" 

Going Sailing Again - Boogedy Boogedy Boo: After a summer in Santa Cruz, we started our fall on the San Francisco Bay with the StFYC Labor Day Cruise to Tinsley Island. MAYAN was sporting some new awnings as she took up her usual place at the Sail Dock. Built from CostCo tarps and PVC pipe, they worked well enough to let their builder (me) avoid extreme criticism. Keeping the Delta sun off the decks helps a lot with the temperature below.

Our trip up the coast was uneventful, took all night, and made under power. For those who aren't acquainted with the central west coast of California, the wind blows hard from the NW, starting around 1200 hours and continuing until about 2100 hours. Most evenings, it dies down, and a few hours later, the sea state calms. The trip from Santa Cruz to San Francisco is almost directly into that strong wind, so we start the passage after a leisurely dinner at around 2200 hours. Typically, we arrive in San Francisco for a warm breakfast ashore. (Of course, Stacey's Soup is gone by 0300.)

Photo finish: Race 1, 2019 Rolex Big Boat Series, Classic Class
2019 StFYC Rolex Big Boat Series, Classic Class: For many years, I have worked with various people to try and get classic yachts into the Big Boat series. This year, with the election of Paul Cayard as Chairman of the Board of StFYC, I found a strong supporter of the idea. We rounded up five stunning classic sailing boats, and the Classic Class was born. Rolex became a strong supporter of the newest class, with two of their team sailing aboard MAYAN in one of the races.

I'll do a separate post about this event. The summary is that the racing couldn't have been better, the addition of the Classic Class was a fan-favorite with the starts and finishes right outside the Clubhouse windows, and there was enough drama for everyone to stay interested to the end of the series. 

MAYAN crossing San Pablo Bay
StFYC Stag Cruise: With the Big Boat Series behind us, we moved MAYAN back into cruising mode and headed up the San Joaquin River to Tinsley Island. The sailing couldn't have been better. Broad reaching in 25 to 30-knot winds, MAYAN set a new record to the Island. This was the first year that our son John joined us. It was great to have him see for himslef the varous hyjinks his male adult relatives have been up to all these years. He also managed to wind 1st place in the Laser racing, no surprise there. Returning to San Francisco, we off-loaded the cruising gear and returned MAYAN to racing trim in time to be ready.

The Sailing Heals Crew
Sailing Heals: This is the first year that MAYAN has sailed with the Sailing Heals team. This organization takes folks with cancer and their caregivers out for a day sail. We were thrilled to host 6 survivors aboard for a sail. Two survivors, who had a little sailing experience, drove MAYAN out under the Golden Gate Bridge, back into the Bay, rounded Angel Island to port, and then back to the City front. The smiles on their faces brought tears to their caregivers. It was a deeply touching event for us all.

2019 Jessica Cup: Once again, we found ourselves setting up on the starting line just outside the Clubhouse windows with a group of classic sailboats. We did miss having YUCCA join us this year but still managed to find the competition excellent. MAYAN took home the Jessica Cup again with a crew hardened by four days of close competition in the Rolex Big Boat Series.

2019 Leukemia Cup: Once again, we lined up with our fellow sailors to support this great event. Once again, the Corinthian YC did a great job of running the races. Once again, we ended up mid-fleet, and that well-sailed Bird boat took home the prize. Despite the challenges, the crew had a fun time sailing for a terrific cause.

Sailing Home Again: Leaving San Francisco after breakfast, MAYAN carried us home to Santa Cruz by dinner time. The calm weather of the fall made this a slow trip down the coast; we powered all the way. After all the trips we'd made this year, that was fine with the crew. Some slept, some read, we all ate Stacey's soup. I wrote out the list of projects for the winter haul-out and watched from the tip of the bowsprit as MAYAN's stem cut through the swells occasionally joined by a porpoise. Remembering makes me smile.

MAYAN winning the start, Race 4, Rolex Big Boat Series, Classic Class

Sunday, February 17, 2019

MAYAN Gets New Rail Caps & Sheet Adjustments


Sheeting To The Rail

Mayan was originally built with some form of inboard sheeting for her jibs, fisherman staysail, spinnaker, and gollywobbler. That was the tradition back in the '20s when Alden designed her and that is the way the Tewie's Dockyard built her in 1947. But over the decades whatever sort of sheeting she had disappeared and was replaced by the newer idea that one run a track along the top of the rail allowing the sheet points to be adjusted by sliding a car along the track. You can see the bronze track and cars with a sheet lead through them in the picture on the right. The genoa sheet is lead to the block ahead of the mainmast shrouds and the advance staysail is lead to the block closer to you aft of the shrouds.

There were two problems with this approach on MAYAN. First, she is a beamy boat. Alden made this choice when designing her so that she could carry more passengers in comfort and so she'd stand up without heeling much in a blow. Her broad beam makes her quite stiff despite the fact that she has only a shallow and relatively light keel. The difficulty is that the beam is wide enough that the sheeting angle is too far outboard and as a result one can't trim the sails in tight enough to allow MAYAN to sail to windward at her best. After doing a bit of calculating, we determined that it would be best to have the sheet points moved about two feet inboard from the rail to get the correct sail shape.

Second, when sails flog or flap they jerk quite hard on the blocks which as riding on the rail. Similarly, when sailing in heavy weather there is a tremendous load put on the sheet and therefore on the rail when gusts hit or when a wave top fills the sail with water. In that case, the bulwark frames and bulwark planking have to carry the load. This is something they weren't designed to do. In the first few years of our sailing MAYAN hard in the strong winds of San Francisco Bay we discovered that the bulwark frames had been moving a little, indicating that they were overloaded. 

In the picture above you can see MAYAN beating past Alcatraz Island in nearly 30 knots of wind still carrying her largest jib. the strain on the rail in these conditions is substantial and well beyond the use she had seen in her earlier life in S. California. It was time to do something about it.

Sheeting Inboard

Once we'd decided to move the sheeting inboard we started exploring various methods. Some recommended simply moving the track off of the rail and attaching it to the side deck, where there is plenty of space. As someone who has had both little toes broken by banging them into objects mounted on the deck, I was completely unwilling to clutter up MAYAN's side decks with bronze tracks with sharp edges and cars running on them. We turned to the oldest way of attaching the sheets and adjusting their angle to get the sail to set correctly. Our guess was that this was used on MAYAN when she was built. Returning to this old technique is particularly interesting because fixed sheet points with barber haulers used to just the sheet lead is now the very latest technique used on the fastest racing boats.

The first step was to remove the track from the teak rail cap. Once that was done we took a good look at the wood, which we believe was installed sometime in the '60s, and decided "While we're in here" we might was well put new rail caps on the boat so we can varnish them. Age has rendered the old teak so badly damaged that we couldn't bring the wood back to a level that would support varnish, and the number of wood plugs we'd need to put in was astounding. So, we removed the rail caps and Wayne announced: "I still have the teak I ordered in 2004 when we rebuilt the hull. It's ready to go." as he wandered off to start locating the raw planks of teak for the new rail caps in the wood shed.


New Rail Caps

(We'll get back to the inboard sheeting once we get the rail cap completed.)

Once all the rail caps had been removed, which required removing hundreds of wood plugs and backing out the bronze screws, we set about filling all the holes in the bulwark and the bulwark frames. The tops of some of the frames had some minor water damage which was treated with epoxy and then all the frame ends were brought up to the correct height with a hard compound of epoxy and filler.

As is typical of Wayne, as soon as the rest of us went to work on the rail cap, he dragged a large teak plank into the shop, built a form of the curve of the transom rail cap which stretches across MAYAN and arches up in the center, and then clamped the raw teak plank to the form. "What's that for?" I asked. "This will let the teak plank get used to the idea that it's going to be bent like that for the next thirty years." Wayne replied with a grin. We lifted the plank clamped to its form onto a shelf in the back of the shop and set about the rest of the work. When we retuned a few weeks later, it was already "used to the idea" of being bent and didn't even try to straighten out when we pulled off the clamps. 

Once templates had been made and the teak milled and rough sawn to shape, the joints were cut between the sections of the rail cap. The picture on the right shows a locking scarf. Three things are important about the way Wayne does this. First, there is the lock in the center of the scarf, which keeps the wood from moving fore-n-aft as it swells and shrinks with moisture changes and as the hull of the boat moves under load.

Second, at each end of scarf he turns the cut to intersect the edge of the rail cap at about a 50° angle. This makes the joint sides thick enough that the thin side won't splinter away during sanding or in the event that something like a block or or oar bangs into the rail cap. 

Finally, in four places along the run of the scarf two inch pieces of bronze all thread will be glued into both pieces of the rail cap from the joint side. This eliminates the need for bolts covered with wood plugs to be inserted into the curved sides of the rail cap. Plugs on rounded surfaces, like the edge of a rail cap, have a bad habit of coming out over time. It's good to avoid them if possible.

With the top edge of the bulwark heavily coated orange anti fungal primer the rails start to work their way forward from the transom plank. The rail cap expands to round the shrouds. In the picture on the left you'll notice that the rail is wider as it goes past the mainmast shrouds. The rail cap is set down over the chainplates and caulked into place once screwed down. 

Before being screwed in place, most of the rail was shaped with a series of router bits and then sanded to a 150 grit finish while the planks were still on the bench. This saves a tremendous amount of back breaking labor when compared to doing the sanding once the wood has been mounted on the boat. 

The process of cutting, shaping, sanding, and fastening the rail caps went relatively quickly. Within a week all the easy parts were screwed down and ready to be finished. But, as is always the case, the difficult fitting came at the corners. 

Here are Wayne and Garrett working the complex joint between the transom rail cap and the starboard side rail cap. Like the locking scarf, these joints were reinforced with two inch lengths of bronze all thread which requires more careful assembly but much less work later on.

In addition to the two large sections, each corner of the rail cap has a triangular piece which allows the rail to sweep gracefully from the side to the transom. Fitting this was Garrett's challenge. He did a terrific job and learned a few tricks from Wayne along the way.

The most difficult part, by far, was the tip of the bow. You can see it on the left. Again, the joints were reinforced with bronze all thread and glued with epoxy. But the curve of the rail, the sweep of the sheer, and flare of the bow all gather together at this point causing each piece to have sides which were far from square to anything.

After an afternoon of careful fitting, Wayne applied the glue and clamped up the pieces with bar clamps, "c" clamps, a special jig he cut from some scrap, and a trailer load tie-down strap. It all held and was aligned perfectly in the morning when all this bondage was removed. 

Because there need to be flat surfaces to clamp against at every scarf and joint, a great deal of hand work was now required to shape the exterior of the rail cap where these occurred. Now came days of that back breaking hand work with everyone pitching in to get the shape just right.

Once shaped the finish work started. In the picture on the right you can see Garrett helping to sand the rail as each coat was applied. 

We're taking a new approach with this varnish stack. At the bottom on the raw wood are two coats of thin sealant. It penetrates the wood and stabilizes the natural oils in the teak. Then we apply three coats of West 207 special clear epoxy. What you see in the picture on the right is the shine of the second coat of epoxy. While difficult to sand, the epoxy is extremely tough and will resist chafe far better than traditional varnish.

Finally, we applied 5 coats of a classic spar varnish to provide UV protection for the epoxy and because it yields a beautiful shine. Because the jib sheet tracks have been removed from the rail, one person can sand the entire rail cap in one day. This is more than twice the speed of anyone who had tried it, especially me.

Now back to the Inboard Sheeting 

With the rail caps nearly complete, Garrett and Rubin set about installing the deck plates which will hold the eyes and snatch blocks for the sheets. In the picture on the left you can see the bronze pad with its removable eye screwed in, upper left. It will be let into the deck. You can see the diamond shape dent which has been cut into the teak to match the bottom of the pad. It has been sealed with epoxy to prevent rot and the bronze pad will be covered in dolphinite to further protect the wood.

Once the pad is pressed into to the teak deck, then the bent stainless steel plate is taken below decks and clamped in place. The holes for the retaining bolts for the pad are drilled using the pad as a template, then through the stainless steel plate. Once drilled, the holes in the stainless are threaded to accept the mounting bolts from the bronze pad. The stainless plate has been pre-drilled and is then thru-bolted to the deck beams ahead and astern of the pad. Once assembled, this construction is extremely strong.

These pads were located approximately three feet aft of the known sheet point for each sail. Then approximately three feet forward of the known sheet point, another pad was installed. Fortunately, this spacing resulted in being able to re-use a number of pads for different sails. As a result, the side decks have a pad approximately every six feet and these pads can manage our entire inventory of sails.

In addition, the pads serve as terminations for the running backstays for both masts.


For each pair of pads assigned to a sail the aft-most pad carries a snatch block which accepts the sail's sheet. the forward pad carries a barber-hauler with a low-friction eye spliced into the upper end. To protect the varnish and more importantly the sailors aboard, the eye in the end of the barber-hauler is run through a soft vinyl tube as shown in the picture on the right. This is expected to reduce the damage done when the sheet is flogging and the eye is swinging around the leeward side deck. 

The lower end of the barber-hauler is secured to the pad's screw-in eye with a hobble splice. This splice, which was become quite popular with the adoption of high strength Dyneema single braid lines, works in a manner similar to a line with a rolling hitch tied around it. When the line is relieved of load, one can slide the hobble to make the line whatever length is required. Once the load is reapplied, the hobble will not slide. Aboard MAYAN we mark the barber-hauler lines to that the crew can preset the hobbles to the correct position for each sail.

Of course, adjustments of the jib lead position do require that the load be removed from the jib sheet using this technique, but that was also true of the bronze track and cars which this system replaced. We also sail with a 6:1 handy-billy on deck. It's quite useful for tasks like pulling the jib or staysail sheet down while one adjusts the barber-hauler.

So far, this system has works quite well. We used it while competing in the Jessica Cup in San Francisco Bay and found it to be reliable and easy for the crew to understand. However, one problem was discovered, with the sheet leads inboard where they belong for the best sail trim, the sheet runs directly over the signboards and running lights on the foremast shrouds. Naturally, we found the lights dangling from their wires and bits of the signboards missing entirely. Not everything goes according to plan, we'll need to relocate the signboards to a place out of the line of fire. The fact that the signboards were damaged is great evidence that we've finally got the sheets in the right places, looking on the bright side.

Saturday, February 16, 2019

Mayan's Progress

MAYAN, foreground

Mayan's Progress

For over two years MAYAN received the able ministrations of Wayne Ettel, master shipwright in his boatyard in Los Angeles. As a result, I've collected the various short bits of progress into one post to make it easy to avoid all this boat building stuff if you wish.

First, we wish to thank Paul Reck for building the model of MAYAN on the left. She's now on display at the St, Francis YC as a part of the club's collection. Paul did a wonderful job and we are thrilled to see her take her place amongst so many beautiful models.

Model building is a skill which amazes us. The patience and care that it takes to construct a tiny version of a boat or ship is significant and rare. The model Paul built was constructed the way MAYAN was, with a keel, stem, sternpost, horn timber, floor frames and frames. Then deck beams and deck planking. The hull was tight planked caravel fashion, as was MAYAN originally. The rig shown in the model is of MAYAN as a transitional schooner, with a gaff foresail and a marconi mainsail. This is the way she was built and the rig we are returning her to. More about Paul here.

While We're In Here.... 

To review, during our 2016 Master Mariner's Regatta we noticed that the cockpit floor was flexing quite a bit as our three 250+ pounders came aft to haul in the mainsheet; we do not have a winch on the mainsheet and it takes all three of them at a leeward mark or during a gybe to make progress hauling in the mainsheet. This prompted a reservation at the Wayne Ettel Boat Spa, which is anything but a "spa". But Wayne is the shipwright who rebuilt MAYAN's hull and deck in 2005 and re-built the interior for us in 2014.

We had known since our initial purchase survey that the cockpit was the only remaining piece of deck from MAYAN's original construction of oak frames, iron nails, and caulked decking. As a result, it had been suspect for some time. After removing the water maker and a few other bits, an exploration of the underside of the cockpit had Beau shaking his head and crawling out with a piece of frame in his hand. He had simply broken a large piece of the frame away; it was rotten. We sailed MAYAN carefully from Santa Cruz to LA, see the earlier post about winds steadily above 40 knots and significant seas, and after the StFYC Commodore's Cruise Wayne's crew went to work on her. 

The first step was to remove the cockpit, a process which took a week and resulted in some discoveries. We have had fuel quality problems for quite a while, and were looking forward to cleaning out the tanks. Only accessible when the cockpit is removed, we found that not only were they badly polluted, but they were also slowly leaking in various places. Out they came. To remove them the main engine exhaust system had to come out, and while we're in here we might was well do that right. This phrase would be repeated many times....

Iron sick beam ends
Iron Sick deck beam
It was easy to see why the beams holding up the cockpit floor were flexing. MAYAN had originally been built with iron nails and they cause what it called "iron sickness" in the oak beams. It's clearly visible in the beam on the left. it also showed up as holes in other beams, no trace of the original nails, just weakened wood with the stain of iron running through it.

Corroded fuel tank
Once the leaking fuel tanks were pulled from under the old deck, it became obvious that they were far worse than we'd imagined. One tank like the photo on the left occupied the space under the cockpit seats on either side, and then a small day-tank to port. Nearly every joint and weld was slowly oozing diesel fuel. While the tanks had clean-outs, which can be seen in the picture, the only way to get to the clean-outs was to remove the cockpit and then remove the tank. We won't be doing it that way in the future.

I think that "while we're in here" should be engraved on a bronze plaque just above the Engine Room entrance! The list grew and grew and grew...... Ultimately, we ended up with a yawning hole in MAYAN where there used to be a cockpit, fuel tanks, and the main engine exhaust. In the photo below you can see Wayne just after we completed removing the fuel tanks. The rudder head is just to the right of his left elbow and we've tossed a sheet of plywood onto of the floor frames so we can have a place to stand while working. Now, to start putting things back together!

Wayne Ettel in the hole that was MAYAN's cockpit

Fuel Tanks

Over the years the expectations for fuel consumption have gone up and up. Originally, MAYAN had an sixty horsepower gasoline engine and a fifty gallon fuel tank. That would push her along at about 5 knots at full throttle and at cruising speed she could travel for about one hundred miles. Of course this assumed there wasn't a headwind or any sort of seas. When out cruising, this meant that one couldn't rely on powering anywhere. The engine was primarily for getting in and out of port and short distances when it was completely calm. There was no refrigeration or heat, no electric lights or navigation instruments, certainly no expresso machine or microwave!  Things have changed. 

We had previously replaced what was left of MAYAN's internal ballast with larger batteries, bring her capacity up to 1,400 Amp hours. We had also installed a hydroponic diesel heater, microwave, expresso machine, refrigeration, RADAR, navigation system, AIS, etc.... All this is considered "normal" in a modern boat MAYAN's size, although almost all of it is entirely hidden from view, leaving the sailor with the illusion that they are sailing in the 1920s. Sometime in the 1970s a 130 horsepower MBZ diesel had been installed, which is capable of moving MAYAN right along at a cruising speed of 7 knots, but with the old fuel tanks she only had a range of about 90 miles. It was time for more fuel.
We also had reservations about the size of the cockpit well. It simply held too much water when a boarding wave came along. The solution was to make the cockpit seats wider. This made the cockpit foot well smaller, the space for the new fuel tanks larger, and the cockpit seat wide enough for people to sleep on deck if they choose to. A triple win! In the picture on the right you can see the new planks which made the seat wider and more comfortable.

While we were at it, there's that phrase again, we decided to increase the size of the secondary sheet winches. In the photo on the left you can see the large primary winches, Barient #35 size. The original secondary is the Barient #22 at the far right in the photo. Between the two original winches are the Barient #28s which we bought from a Cal-40 owner, they were original equipment aboard those wonderful boats back in the '60s when they were built. We repurposed the Barient #22s to upgrade the halyard winches for the spinnaker and fisherman staysail halyards.

We also decided to relocate the fuel fill plate while we were at it. These used to be located in the cockpit seats, and when the weather got rough  a pool of water would sit atop the fill plate. Naturally, this lead to salt water getting down into the diesel fuel and allowing the algae to grow in the fuel tanks. A terrible problem we had been fighting since we bought the boat. 

By locating the fuel fill plates on top of the winch islands there can't be any standing water atop them, it's easy to wipe up spills without staining the teak, as it's varnished up there, and it's much easier to get the fuel hose to the fill plate without banging into the cockpit combing. All great features of this new locations. 

With the fuel tanks approaching completion, the fill lines cut in and the new winch mounting bolts installed. Garrett started doing the dry fit of the new cockpit prior to varnishing and installation of the inset panels. 

Garrett is popping out of the hatch in the cockpit floor which allows access to the prop shaft and rear side of the main engine. It also provides a tremendous amount of air flow through the engine room when one has to work on the motor in hot weather. The cockpit floor is built of plywood covered in epoxy and carbon fiber, substantially stronger than MAYAN's old cockpit floor even when it was new.

In the upper left you can see the rudder head and the cut out in the cockpit floor around the horn timber. The wheel box will eventually go over this and hold the steering gear. 

Much of the fuel tank construction was performed by Garrett. They are built of carbon fibre and epoxy, a material vastly superior to welded metal. Of course, they would look terrible if they were exposed and spoil the feel of the 1930s, so they'll be completely hidden under the seats and cockpit sides. On the right you can see the two carbon fuel tanks with all bronze fittings. There are baffles internally to avoid slapping sounds while underway. Also, unlike the old tanks which had a stand-pipe to pick up the fuel above the sludge in the bottom of the tanks, these tanks are built to have the pick up at the lowest point in the tank so that any sludge is immediately transferred to the traps and filters where it can be removed.

Once all the cockpit bits were installed, it was time to add the teak grating and decking, the portholes which allow fresh air into the engine room, the engine instruments, and a lot of varnish before we re-installed the wheel box, wheel and binnacle. 

There's a wonderful tradition with Alden schooners. Every one of them that I've been aboard has a port hole which opens from the outside and leads into the engine room. At first I didn't understand the purpose of it opening from the outside. Then I read a article in an old Rudder magazine in which Alden described being aboard an 1920s fishing schooner far out at sea. A fuel line had leaked and caused a fire in the engine room. The only way to get to the fire to put it out was to open the hatch in the deck at the top of the engine room. When they opened the hatch, the fire got a lot more air and the flames roared out through the open hatch. Eventually, the crew managed to get buckets of water down the hatch and put out the fire. But, from then on, every Alden design has a port hole opening from the outside so that one can push the nozzle of a fire extinguisher into the engine room without opening a hatch and feeding massive amounts of fresh air to the fire.

With her new larger fuel tanks, MAYAN now has a range of over 500 miles without reducing speed to improve fuel consumption, and while running the refrigerations, heating, microwave, and espresso machine. You have to have the espresso machine running!

In the next post we'll go into various other projects that were the result of following the "While we're in there" creed including new rail caps, new jib sheeting system and a new samson post.